Hugo自动部署到ftp server
我的个人博客从WordPress迁移至Hugo后,每次写完新的blog发布变成了一件很麻烦的事,需要这么几步:
- 通过markdown格式很写blog
- 启动
hugo server -D看效果 - 使用
hugo -D生成部署文件 - 将上一步生成的部署文件上传到ftp server:由于资源的上传不知道哪些资源有变更,还需要先把已经存在的资源先删除,再重启全部上传一遍。
最后一步最烦,所花的时间也最久。
在网上查了一下hugo自动部署到ftp,还是有办法的:
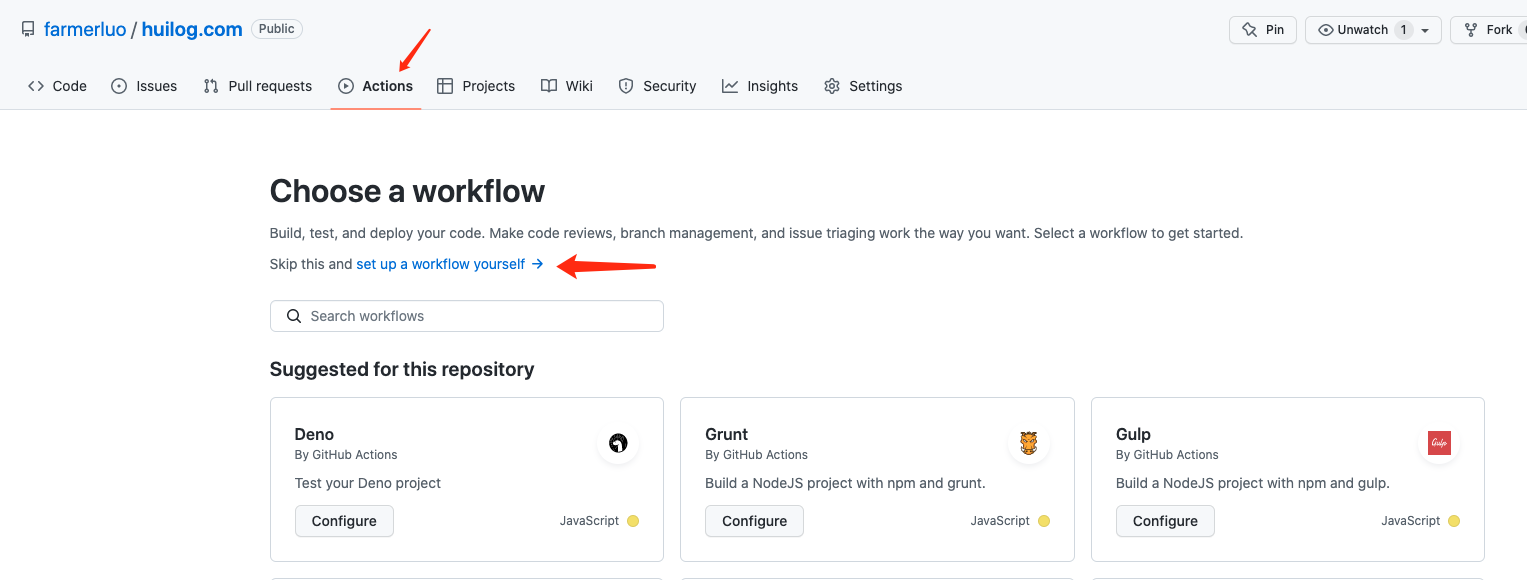
通过github上的Actions来实现CD的功能。步骤如下:
第一步:
第二步:
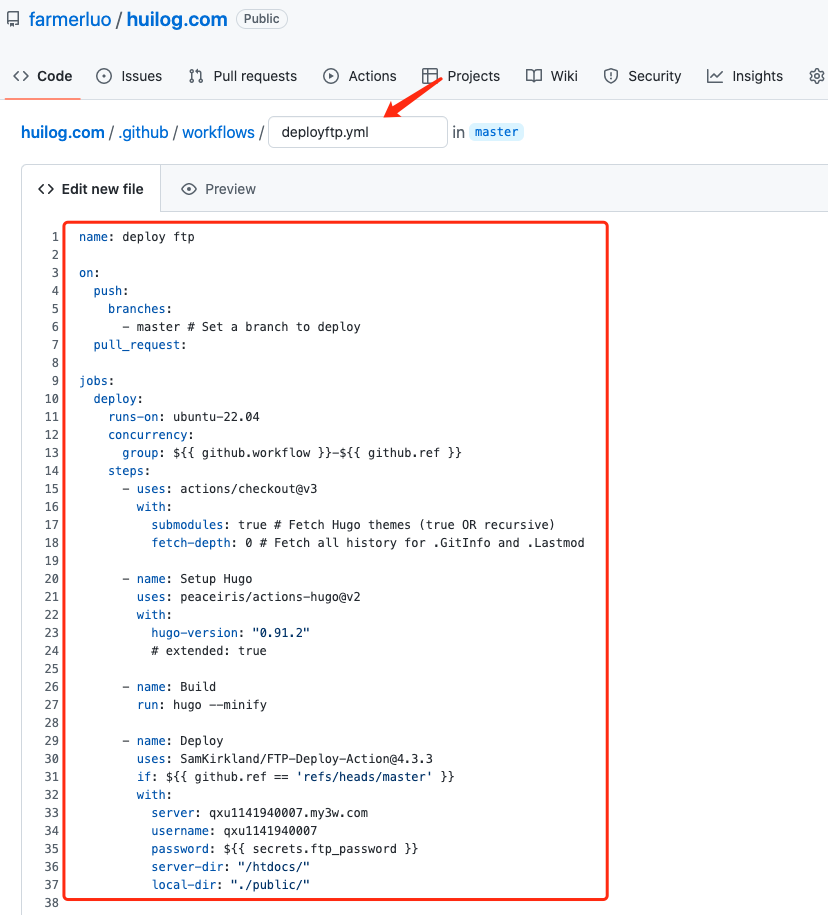
如果不想用上面的方法在github页面上操作,也可以直接在git仓库的.github/workflows/目录下新建一个deplyftp.yml文件,内容如下:
name: deploy ftp

on:
  push:
    branches:
      - master # Set a branch to deploy
  pull_request:

jobs:
  deploy:
    runs-on: ubuntu-22.04
    concurrency:
      group: ${{ github.workflow }}-${{ github.ref }}
    steps:
      - uses: actions/checkout@v3
        with:
          submodules: true # Fetch Hugo themes (true OR recursive)
          fetch-depth: 0 # Fetch all history for .GitInfo and .Lastmod

      - name: Setup Hugo
        uses: peaceiris/actions-hugo@v2
        with:
          hugo-version: "0.91.2"
          # extended: true

      - name: Build
        run: hugo --minify

      - name: Deploy
        uses: SamKirkland/FTP-Deploy-Action@4.3.3
        if: ${{ github.ref == 'refs/heads/master' }}
        with:
          server: qxu1141940007.my3w.com
          username: qxu1141940007
          password: ${{ secrets.ftp_password }}
          server-dir: "/htdocs/"
          local-dir: "./public/"
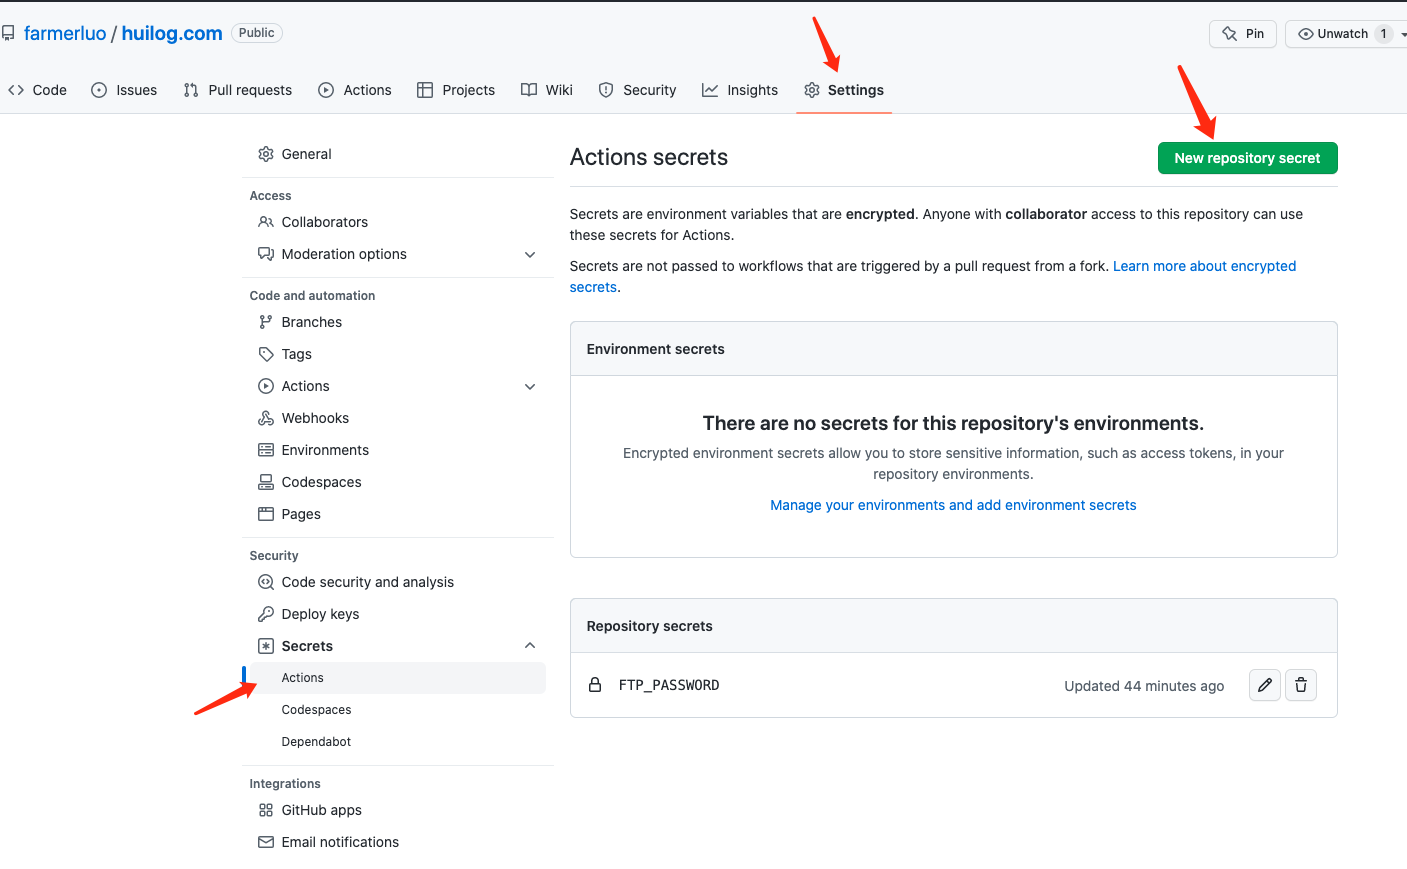
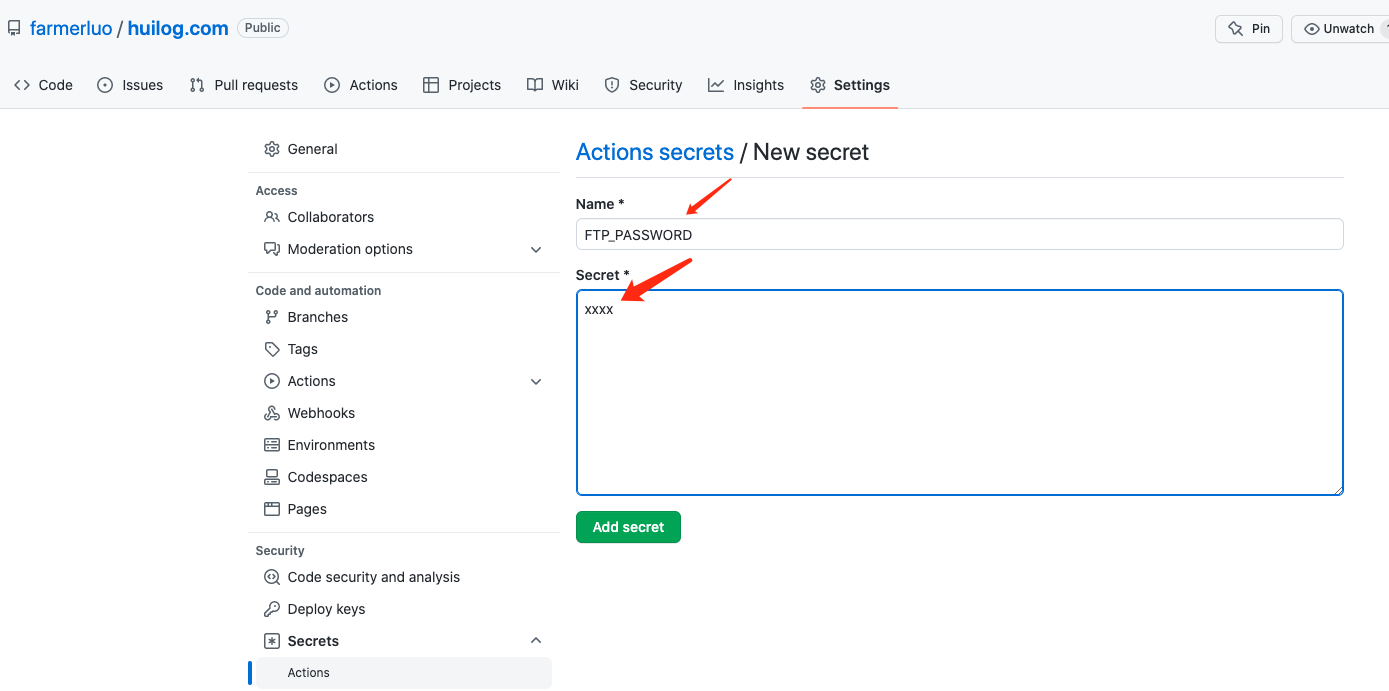
我们可以看到在CD的配置中,有一个${{ secrets.ftp_password }},这是ftp server的密码,我们需要在github上配置:
上面全部配置好后,下次写完blog,直接提交到github,就完事了,github的actions会自动执行部署:
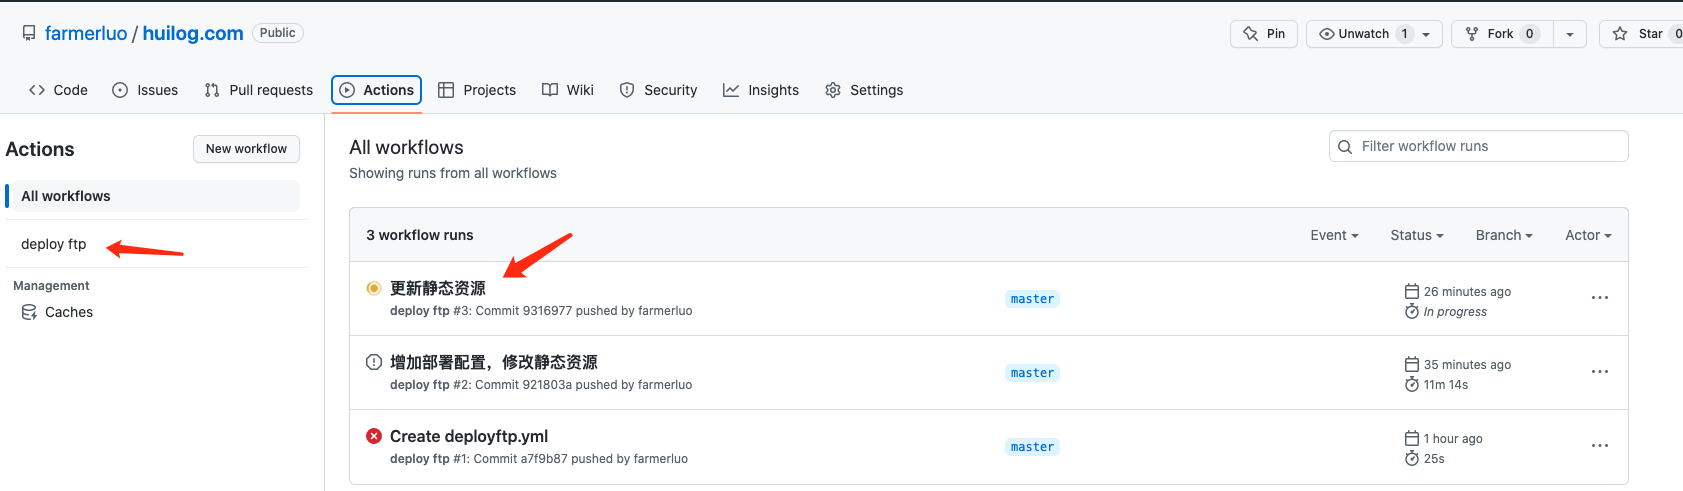
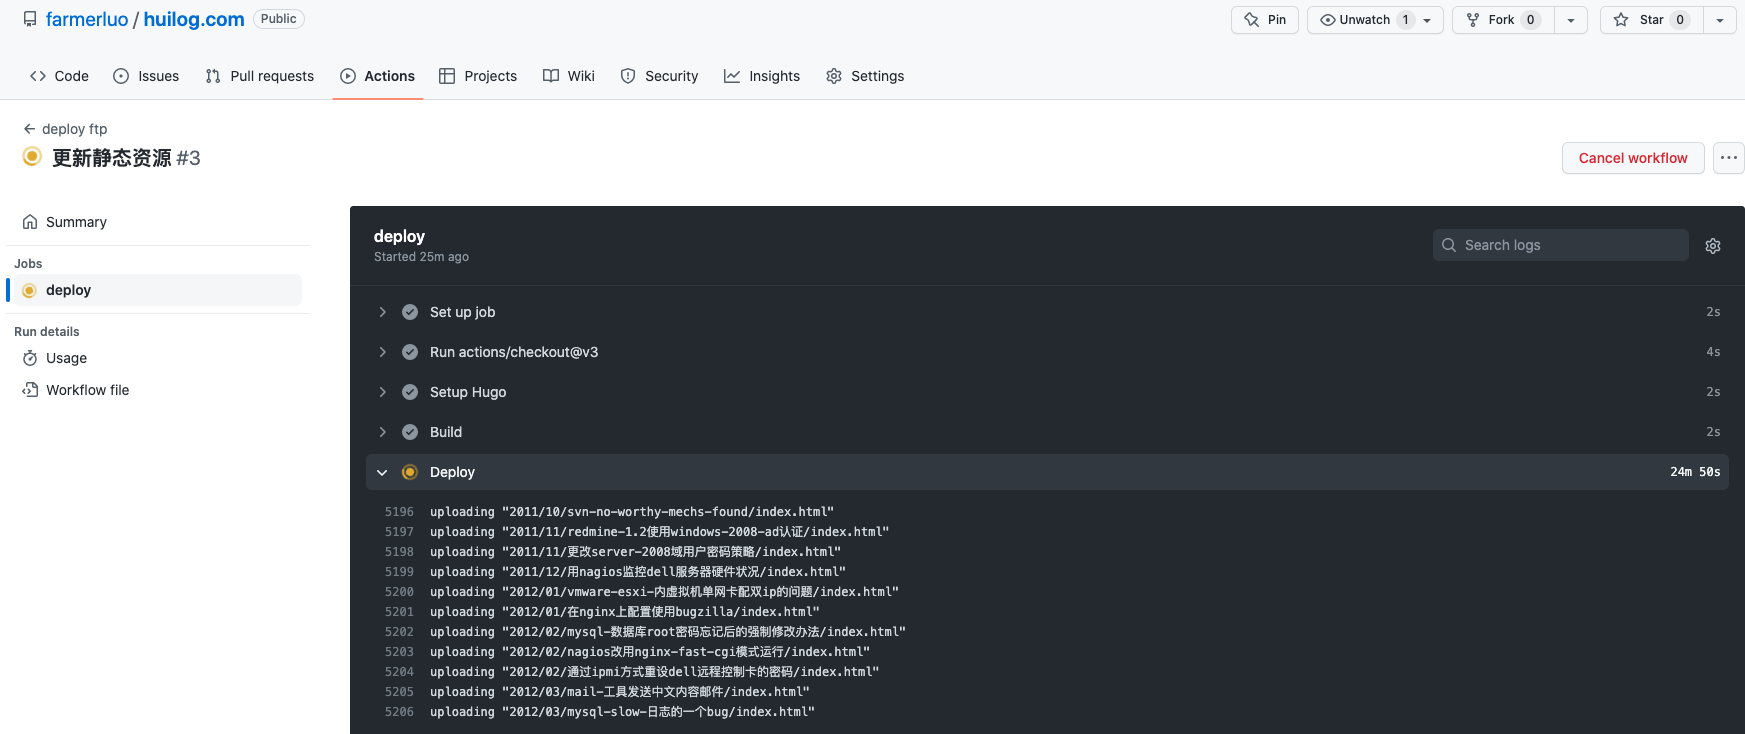
很方便,唯一的缺点是慢,这个无解,国外到国内都这样,慢就慢吧,反正也不急。
参考: