cacti对mysql server的多端口监控
监控mysql server的性能,在cacti上内估计很多人都是用mysql-cacti-templates模板吧,但是它默认的配置只支持标准mysql 3306端口的监控。
其实它的脚本是已经支持多端口的,只是模板内的配置默认不支持而已。脚本的参数如下:
Usage: php ss_get_mysql_stats.php --host --items [OPTION]

   --host      Hostname to connect to; use host:port syntax to specify a port
               Use :/path/to/socket if you want to connect via a UNIX socket
   --items     Comma-separated list of the items whose data you want
   --user      MySQL username; defaults to root if not given
   --pass      MySQL password; defaults to 5MebCCNrzdPYpx3L if not given
   --heartbeat MySQL heartbeat table; defaults to '' (see mk-heartbeat)
   --nocache   Do not cache results in a file
   --port      MySQL port; defaults to 3306 if not given
   --mysql_ssl Add the MYSQL_CLIENT_SSL flag to mysql_connect() call
今天花了几个小时的时间把它改成支持多端口的了。
改起来也简单,每个Data Input要改两个地方,但就是数量比较多,眼都花了,累死人:
- 在Console -> Data Templates 找到mysql-cacti-templates的mysql模板,编辑:
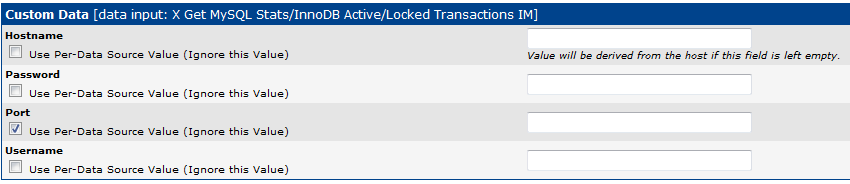 在这里面把Port的Use Per-Data Source Value (Ignore this Value)选中,意思是由用户输入这个参数的值,然后保存。
把所有有关mysql模板都按上面的方法更改。
在Console->Data Input Methods内,把所有有关mysql数据项的Port都改成不请允许为空。
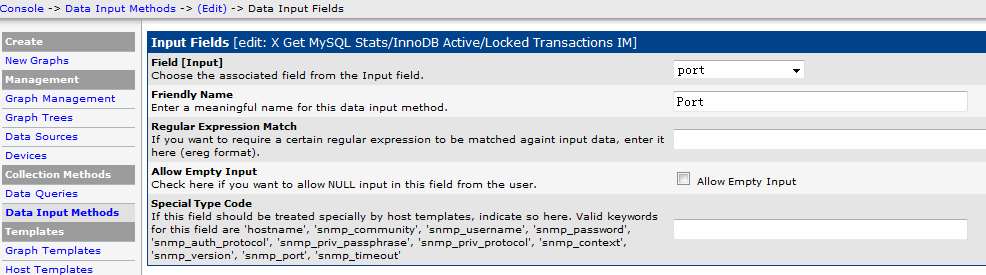 取消选中Allow Empty Input,保存。
上面全部改完后,在创建图型的时候会提示输入端口:
 输入你自己的mysql server端口。然后点create就好了。
今天改好的模板我已导出,下面有下载地址,以便给需要的人使用。
多端口mysql模板用法:
导入模板的xml文件到cacti
把mysql-cacti-templates带的ss_get_mysql_stats.php文件放到cacti/scripts目录下便可。
多端口mysql模板是在better-cacti-templates-1.1.8基础上做的更改。
多端口mysql模板: http://farmerluo.googlecode.com/files/cacti_host_template_x_mysql_server_ht.xml
mysql-cacti-templates: http://code.google.com/p/mysql-cacti-templates/